Printing
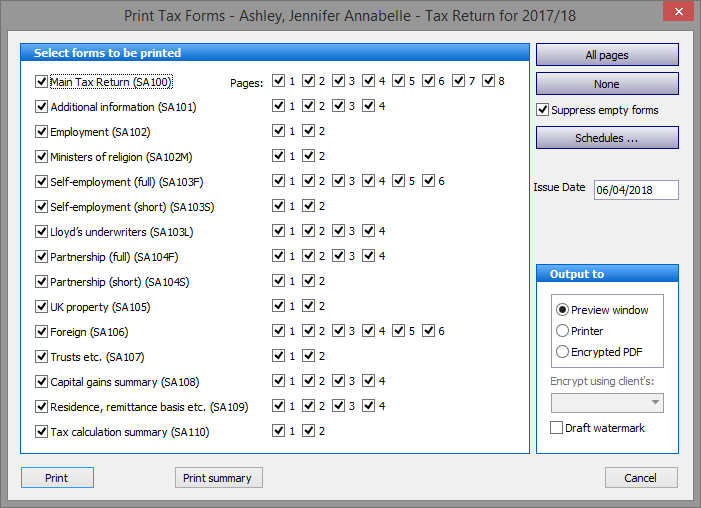
Under the Tax Returns heading on the left hand pane of the main screen select Print Tax Return to open the Select forms to be printed screen.
If you wish to print the entire return, proceed by hitting the Print button in the lower left hand corner of the screen. The program defaults to outputting to the Preview window. If you require hard copy select the Printer radio button in the Output to box in the lower right hand corner. There is a third option to print to an encrypted PDF file using an encryption password set up in the Main Details screen, the client's UTR or NI Number.
You may view/print any combination of forms/pages clearing the boxes by unchecking the ticks. Clicking the None button clears all the ticks allowing you to manually select only those items you wish to print.
Note: Checking the forms boxes on the left hand side of the screen selects all the pages of the form. You may select only the Pages you wish to print by checking or unchecking the boxes.
The entry in the Issue Date box is reproduced on page 1 of the main return and defaults to the first day of the fiscal year. This may be overwritten to the date on which HMRC actually issued the return.
Outputting to the Preview window provides an onscreen view of the forms and pages but only where there is data. By default blank forms are not printed but this setting may be overwritten by unchecking the Suppress empty forms button in the upper right hand corner.
Proceed by hitting the Print button.
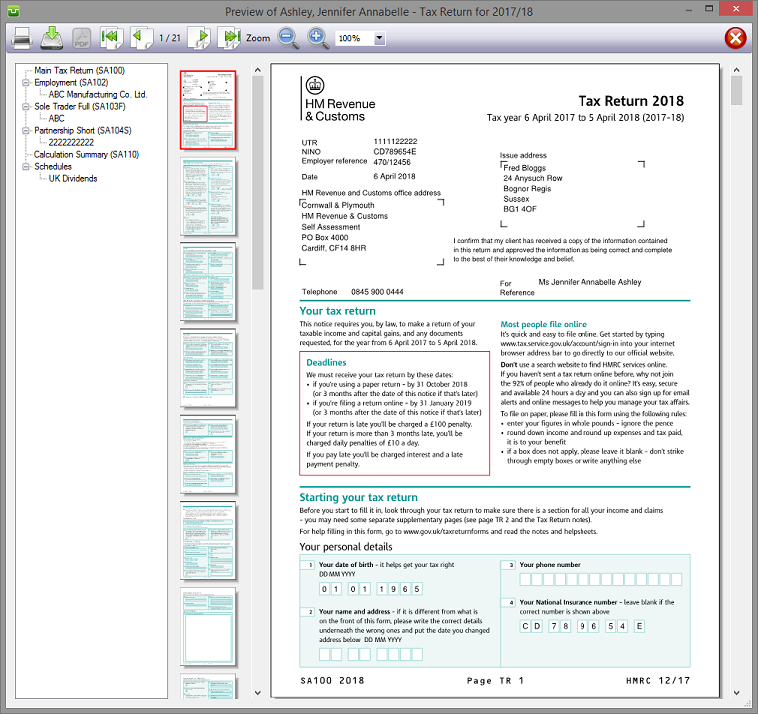
The Preview window comprises four specific areas, the toolbar and three panes.
Clicking the icons on the toolbar allows printer selection, saving the forms to a pdf file and printing to a pdf document. The remaining icons are the common pdf navigation and sizing operations.
Selecting a form in the "tree" in the left hand pane allows you to quickly move to that form.
The icons in the centre pane are miniature versions of the pages. As your mouse pointer hovers over these the page number of the form appears as a "pop-up" window. Use the scroll bar to the right of the icons to quickly move through the pages.
The large left hand pane shows each page of the printed return enabling you to check the entries printed therein.
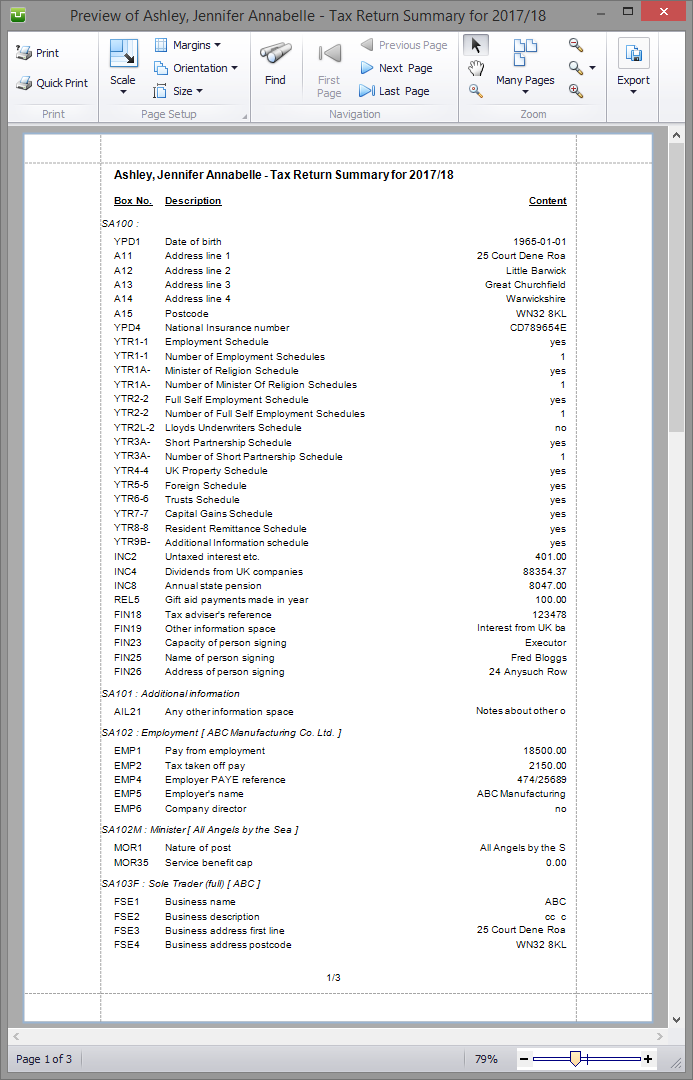
Clicking on the Print summary button provides a list of all entries in the tax return and supplementary pages. These are identified by the box numbers assigned by HMRC and only boxes with entries are printed. This forms an "at a glance" summary to either send to your client or file with his or her records. Due to space limitations some text entries e.g. addresses may be truncated.
Schedules
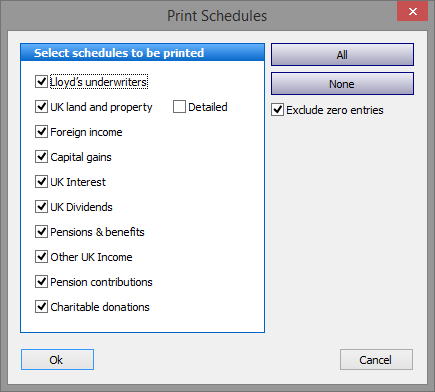
To select the schedules to be printed first click on the Schedules... button in the right hand pane then select those pages you wish to print. As with Printing, the program defaults to All although only forms with data will be printed.
Clicking the None button clears all the ticks allowing you to select only those schedules you wish to print.
By default blank schedules are not printed but this setting may be overwritten by unchecking the Exclude zero entries button in the upper right hand corner. Checking the tick box ensures that no schedules will be printed for a source where standing data is present but there is no income e.g. a bank account exists but no interest was received in the year.

Copyright © 2025 Topup Software Limited All rights reserved.